

One important feature of stamped concrete is durable, hardcore, a permanent structure for outdoor floors. Once installed, you would not ever have the option of taking them out of the ground and changing them. When flaws exist, you may want to do it, such as uneven patterns and unleveled stamping design on the surface.
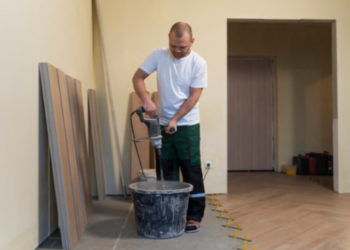
It is essential to learn about the step-by-step process of stamped concrete. Being precise is necessary for installing this type of decorative floor application, and there is no room for mistake, to say frankly.
So check out today’s article and see in detail how concrete stamping comes to life.
Essential Steps to Follow in Concrete Stamping
Stamped concrete patios, driveways, and pool decks come out the best when an expert does the job. That is why you got a team like stamped concrete Las Vegas to make sure all the steps rightly take place.
Here to share with you how the pros are the essential process involved when designing the outdoor concrete floors with stamped patterns.
1- Flooring System Preparation
The first stage involves placing the subgrades and forms. What are forms, you may ask?
Before you see a stable, seamless piece of flooring, many layers of subgrade and concrete formings are built underneath the surface. Yi is just witnessing the frosting on the cake. Before everything could stand, the base of the slabs was prepared.
Under this specific stage, here are bits of what takes place:
- The soil or the subgrade is prepared, ensuring that the base is leveled and even.
- Ropes, wires, or wooden stakes are used to measure the linear edges of the floor to serve as a guide where to pour the concrete.
- Concrete forms are added for support and guide in pouring as well.
- The forms should be stable and must have no unevenness when placing them.
2- Installing Reinforcements
The reinforcements provide support for the slabs. It consists of steel bars and wire mesh to hold the concrete when cured. Imagine if there were no steel reinforcements and the flooring base is made of pure concrete.
That would not hold well. If a heavy load contacts the surface, it would easily crack. Without the reinforcement, the concrete floor would instantly crack.
A professional concrete installer would take an accurate measure of the flooring area to fit the size of the reinforcement. Also, it is critical to have the right size of steel bars and wire mesh to use.
3- Concrete Pouring
The next step is to pour the concrete. A certain thickness of the concrete mix requires a fast application. A truck loader transfers all the concrete compounds in a single pour. And doing so would prevent the segregation of the material.
A manual pouring is possible if you got t a small flooring area. If pouring is done manually on a massive space, the amount of concrete poured in installments would result in segregated patterns having an uneven look compared to a seamless monolith block that would make up the entire flooring system.
4- Concrete Canvas
After pouring the concrete mix, the following process is critical, and it should be followed by screeding and finding them right away. Let’s define the two essential steps of the following:
Screeding is the act of accurately and quickly spreading the concrete mix to have its top surface eve and seamless. It is like a clean canvass or paper that no crumples and creases would exist.
The canvas of the floor should be smooth and clean. Even a tiny hair or leaf shreds should not be found. Screeding makes sure that the surface is straight all the way, from one edge to another.
5- Finishing and Coloring
After screeding the surface of the main slab, the decorative finishings follow. You can add a touch of colors or patterns that makes a distinct texture so n the surface.
Applying concrete coloring is an essential decorative touch on the concrete floors. You do not need vibrant, overpowering colors for this, and a natural, earthy pigment will do just fine. Another way to color the floor is with staining.
Applying the finishing application would require another curing time. So, be aware of this step and ensure that all the materials cure correctly.
6- Adding concrete joints
And before you complete the entire flooring system, the second to last stage is adding joints. These joints would give a small space for contraction and expansion. Concrete materials, especially the ones built for the floors, are prone to cracks due to expansion caused by weather changes.
An expert installer would know the right measure of the joints. This should not be too deep, narrow, or wide, giving an undesirable look to the concrete surface.
7- Sealing the concrete
The last and final step for every concrete floor installation is applying the concrete sealer.
It is important to note, too, that the sealers come after making the joints. That ould give the floor a seamless and polished look. It would also help not to make the joint gaps too obvious. Also, the sealers will protect the entire material making it durable. Sealers add life to the concrete floor, preventing all sorts of damages to the floor surfaces.


